Despite the plans for a swift defeat of the Ottoman forces and a rapid allied movement to take Constantinople, the reality of the Gallipoli campaign was that it stalled on the peninsula and barely moved over a period of eight months. Each day saw regular attempts by both the allies and the Turks to advance and the bulk of the campaign was marked by localised attacks in the different zones followed, usually within hours, by a series of counter attacks from the other side. The fighting cost thousands of lives with men being killed by rifle fire, artillery attacks and shrapnel bombs. Across the campaign there were three key moments when major attempts were made by the allies to take control of the situation, and all these major events involved large numbers of Irish-born troops.
Sir Ian Hamilton had been appointed Commander in Chief of the Mediterranean Expeditionary Force on 12 March and would be in charge of the land assault on the Dardanelles in April 1915. Under his command would be the Royal Naval Division, the Australian and New Zealand Army Corps (ANZAC) and the 29th Division of the British Army. The 29th Division was the last regular division of the British Army that had not yet been engaged on the western front and included the Royal Munster Fusiliers, the Royal Dublin Fusiliers and the Royal Inniskilling Fusiliers. Hamilton's plan was to land massive number of troops on the peninsula in two zones (with two additional feint landings to confuse the Turks) who would then proceed from the beaches, take out the Turkish defences and their artillery, and clear the way for a naval assault through the Dardanelles and onto Constantinople.
The landings were originally planned for 23 April but were delayed for 48 hours due to bad weather. Finally on 25 April the landings took place. The two zones for the landing were:
In addition to these two major landing sites, French forces would also land at Kum Kale and Besika Bay with the intention of confusing the Turkish defenders and also tackling the artillery in those places to prevent them from firing on the main landing beaches.
Hamilton's plan envisaged an amphibious landing of nearly 7,000 troops on the morning of 25 April who would ultimately be backed by a total force of 60,000 men once the landings had been completed. Once landed, the troops in the Helles Zone would then advance inland to secure Hills 114, 138 and 141 and the village of Sedd el Bahr, while those at ANZAC would take the high ground at Mal Tepe. Historians who have studied the Gallipoli campaign make clear that Hamilton's objectives for the day were hazy at best, and that the allied knowledge of the terrain that they would fight in and the strength of the Turkish defences was ill-informed.
In the event, the Turks had used the period between the end of the naval campaign in the Dardanelles in March and the landings a month later to move high levels of troops into the area and also ensure that defences of underwater obstacles, barbed wire across the beaches, and well entrenched artillery were all in place.
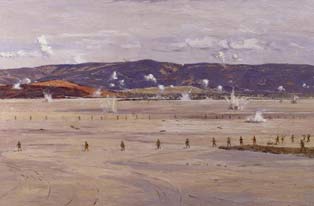
The landing at S Beach was the smallest but the area was taken by the allies with relative ease and with few casualties. At Y Beach the landings began at 4.45 am and were completely uncontested with no Turks in sight defending the area (though the allied soldiers would be attacked by a Turkish force in the afternoon, and have to abandon the beach the next morning). At ANZAC the allied troops were landed but not as a single force as the initial landing boats became bunched and confused and, as a result, did not all come to shore where they were supposed to. Once landed the ANZAC troops regrouped and began moving inland where they met with fierce resistance from the Turkish defenders. Fighting continued throughout the day and into the night. The ANZAC commanders feared that the attack was failing during the evening and that the men were becoming demoralised. They even sent messages to Hamilton to ask whether the force should be evacuated from the beaches, but their request was denied. The landings at ANZAC were costly in terms of numbers wounded and killed, and the area would witness fierce fighting in the months to come. Compared to the successful initial landings at S and Y Beach, the situation at V and W was completely different. Here the Turkish defences were strong and the defenders ready for a fight. At W Beach the Lancashire Fusiliers landed to be met with with intense Turkish fire. Although the landing would ultimately be successful, the Lancashires suffered terrible casualties with 600 men being killed or wounded. The Lancashires fought bravely, and six men would be awarded the Victoria Cross for their actions during the landing.
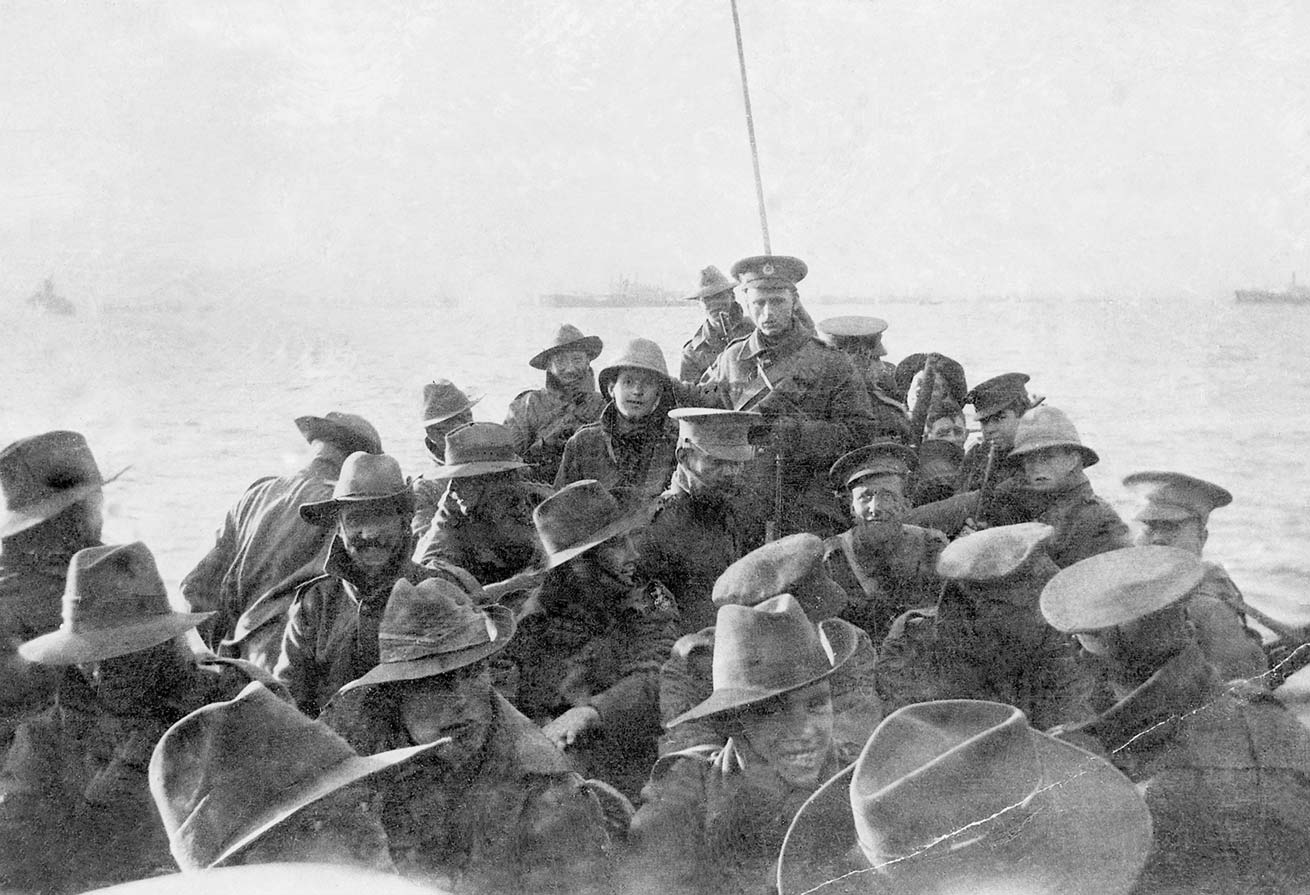
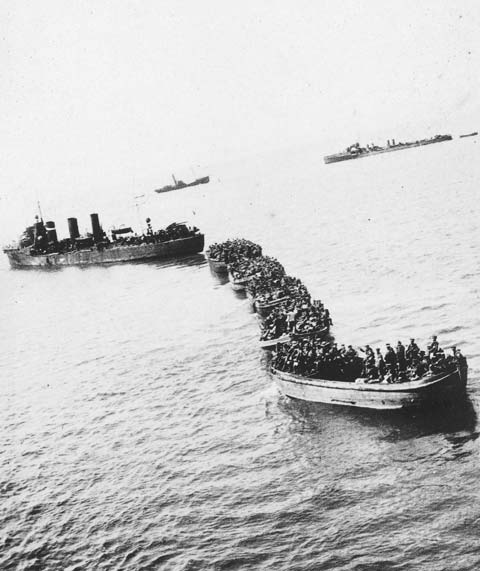
The landings at V Beach were where two Irish battalions, the Dublin and Munster Fusiliers would see action. V Beach was heavily defended by the Turks who were well entrenched in high ground above the beach and in the remains of an old fort. The plan for V Beach was for one group of Dublin Fusiliers to be landed on the beach from tows, while the remainder, alongside the Munster Fusiliers and two companies of the Hampshires, would emerge from an old collier, the River Clyde, which would be beached as close to the shore as possible. The landing was supposed to begin at 5.30 am, but due to a strong tide and problems manoeuvring the tows the landing did not take place until 7 am. Due to the delays and some confused communications the artillery barrage that should have been fired relentlessly from HMS Albion (thereby dislodging the Turkish defenders) only lasted for a highly ineffective forty minutes. Once the landings began the Turks were waiting and had barely been troubled by any pre-emptive artillery fire.
When the Dublin Fusiliers' tows came close to the shore and men began to disembark into deep water the Turks began to fire. The result was devastating and many men were killed without ever making shore or leaving their boats. Those who did make it ashore took cover under a small sandy bank where they would remain for most of the day. The men inside the River Clyde attempted to leave the ship and exit towards the beach via a series of interconnected lighters. Again the Turks targeted the men as they emerged with devastating results. Captain Geddes of the Munster Fusiliers, who led a charge of his Z Company out of the River Clyde, recalled: 'Captain French of the Dublins told me afterwards that he counted the first 48 men to follow me, and they all fell... There is no doubt that men were drowned owing chiefly, I think, to the great weight they were carrying... I estimated that I had lost about 70% of my company.' In the face of such carnage the decision was made to halt the landing from the River Clyde, and so the remaining 1,000 or so men still on board would wait the day out inside the old collier. At nightfall the remaining men were disembarked from the River Clyde, and the beach finally taken. The next day the Dublin and Munster Fusiliers would begin fighting their way inland to capture the village of Sedd el Bahr.
In all it is estimated that the landings by the allied forces at the Helles sector cost some 3,800 casualties or 20% of the 29th Division. However, despite the devastating loss, the landings had been effected and by the morning of 26 April the allies had landed 17,000 men on the peninsula.>
Throughout the fighting of the late spring and early summer the allies failed to make any significant headway and the battle lines on the peninsula became largely static. Hamilton decided that a fresh initiative was required if he was going to seize his target of Chunuk Bair. His plan was to land fresh troops at Suvla, establish a base and advance into the heights of Sari Bair from the north west. The operations, as Gallipoli historian Robin Prior has noted, 'have gone down in British military history as an example of supine incompetence equivalent to the surrender at York in 1776 or at Singapore in 1942'. At the disposal of Hamilton and General Sir Frederick Stopford, who was effectively the planner of the offensive, were the 11th Division and the 31st and 32nd Brigades of the 10th (Irish) Division. The 10th (Irish) comprised men that were reservists or who had volunteered from across Ireland in the autumn of 1914, had been trained in England in the spring of 1915 and transferred to various parts of the Mediterranean during July. These men were mostly not professional soldiers and many were already sick with diarrhoea. They were ill-prepared for what was coming at Gallipoli given that, for most, it would be their first taste of war and their purpose in the offensive was unclear as Stopford had given the division commanders no instructions as to their objective.
The August offensive would begin early in the morning on 7 August with the various brigades being landed at Suvla Bay. The 11th Division landed unopposed at their various landing points, and were able to begin to move inland. The 33rd and 32nd Brigade attacked the Turks at Lala Baba and successfully took the hill but with high casualties. Elsewhere the landings were a mess with lighters landing at the wrong points, and brigades finding themselves in the wrong place. When the brigades sorted themselves out and began working towards their intended targets, such as Hill 10, they found them heavily defended and were often pinned down by Turkish attacks. Within a matter of hours the whole landing at Suvla Bay had stalled and, with the exception of the 11th Manchesters who were able to advance towards Kiretch Tepe, none of the inland objectives were being taken. The allied offensive was behind schedule.
In the early morning of the 7 August Stopford finally decided what he wanted the 10th (Irish) Division, under the command of General Bryan Mahon, to do, and he ordered them to land at A Beach in Suvla Bay. They were then to take Kiretch Tepe Ridge, also assist in the capture of Hill 60 and then advance onto Chocolate Hill. At dawn the order for the division was changed and they were instructed to land at B and C beach. While half the division were in the process of being landed at B and C beach, the remainder were given a new instruction to land at A Beach West. The result was that the division was spread across the whole of Suvla Bay. When Mahon landed at A Beach West he had only four battalions under his direct control, while five battalions were away on the original landing sites at B and C beach. The latter were placed under the command of Brigadier General Hill who wanted to move his troops to where Mahon was and use the division to attack Kiretch Tepe Ridge, as had originally been intended. He was overruled and instead his men committed to launching an attack on Green and Chocolate Hills.
In the march towards the target hills the men of the division had to cross the barren Suvla plain and were ready targets for Turkish snipers who began firing on them. Once at Chocolate Hill the men found that the Turks had fled and were able to take the target and secure it by nightfall. For the men of the 7th Battalion of the Dublin Fusiliers the day had been costly: 100 men had been wounded, killed or gone missing. At the other end of the bay, the remainder of the division was tackling Kiretch Tepe Ridge. The Inniskilling Fusiliers remained on the beach, while the Munster Fusiliers began the assault on the ridge under heavy Turkish fire. At nightfall they stopped their attack and rested on the steep hill under regular sniper fire. On 8 August the attack continued but with no success. Additionally the men were suffering from dehydration in the intense summer heat. What water they had brought ashore with them had been drunk, and the confusion at the landing site meant that they were not being provided with a regular fresh supply. The ridge was not taken in the following days and on 15-16 August a major assault was planned for the men of the division. It was a costly assault, and many men were killed by enemy fire with the 6th and 7th Dublins losing men at an alarming rate.
By 17 August the assault on the ridge had stalled and the division was allowed to withdraw to the beach for some rest. Hundreds of men had been killed, the ranks of the officers depleted and many, many were wounded. By the end of August the division was at half of its original strength and around 3,000 men were dead. In September the division was moved to Salonika. The August offensive had been a failure and the 10th (Irish) Division had paid a high price.
Given the high cost of the Gallipoli campaign and the lack of any breakthrough it became obvious to the allies that the campaign had failed. After advice from the military, the War Cabinet in London decided, on 7 December 1915, to evacuate the peninsula. The logistical challenge was enormous. Somehow the allies had to get some 83,000 men plus equipment and stores out of Gallipoli without the Turks noticing. It was feared that if the evacuation was noted by the Turks, and they attacked a depleted and evacuating force, there would be a high casualty toll.
In the weeks leading up to the final evacuation the numbers of soldiers at Gallipoli was steadily reduced so that only the necessary men to hold front line trenches were left. Silent periods each day were introduced by the allies so that the Turks would become used to the reduction of noise in the trenches as the numbers of men thinned out. In addition to moving men and equipment off the peninsula the allies also had to set about destroying much that was non-essential such as food stocks, machinery and munitions. Many of the horses and mules that had been brought to Gallipoli had to be shot, and the cemeteries around the peninsula containing many of the allied dead of the campaign were prepared to be abandoned. While the evacuations were undertaken there were attacks on allied trenches by the Turks, regular exchanges of artillery fire and men continued to be killed.
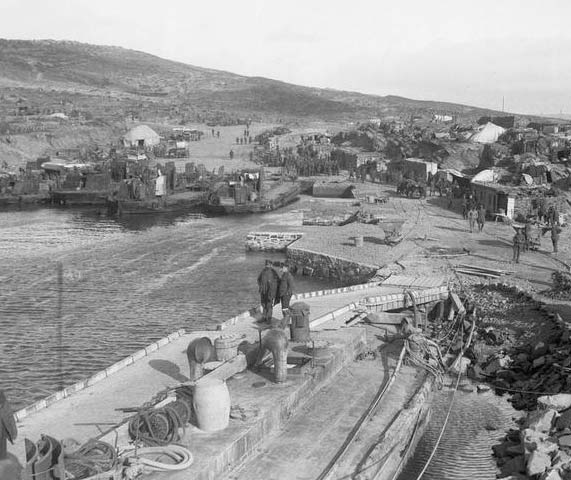
The evacuation began in the ANZAC and Sulva zones on the night of the 18 December, and would continue until the last man left the Helles zone, where evacuations had begun on 28 December, on 8 January 1916. The 1st Royal Dublin Fusiliers left Gallipoli early in the morning on 2 January 1916. They left from the same place where they had landed, V Beach. The Regimental Diary recorded the evacuation: ‘Sudden orders to embark from V Beach… after much delay finally embarked via River Clyde – at about 04.00… all aboard jut as day was breaking. Transport Ausonia. Reached Mudros (Lemnos) about noon and disembarked during afternoon. Marched to camp at Mudros East’.
The evacuations were heralded as a great success by the military commanders. They had managed to get everyone away from Gallipoli with minimal loss of life. Many observers have wryly commented that the evacuation was the only well planned and properly executed phase of the entire campaign. For the Irish at Gallipoli the campaign was over, and they would continue their war in other theatres. For the 1st Royal Dublin Fusiliers the statistics of the Gallipoli campaign were damming. Of the 1,012 men who had landed on V Beach in April 1915, only 11 were there to take part in the retreat from the same beach. The other 1,001 Dubliners had either been killed, died of disease or been invalided out of the war as a casualty.